How to install Snap frame
Below instruction how to install snap frame
How to Open and Install a Snap Frame on the Wall
Tools needed
- Snap frame
- Screws
- Wall anchors if needed
- Drill
- Screwdriver
- Pencil
- Level
- Measuring tape
Before you start
- Make sure the wall is clean and flat.
- Check that the frame is facing the correct direction.
- Confirm whether the wall is drywall, concrete, wood, or tile so you use the correct screws and anchors.
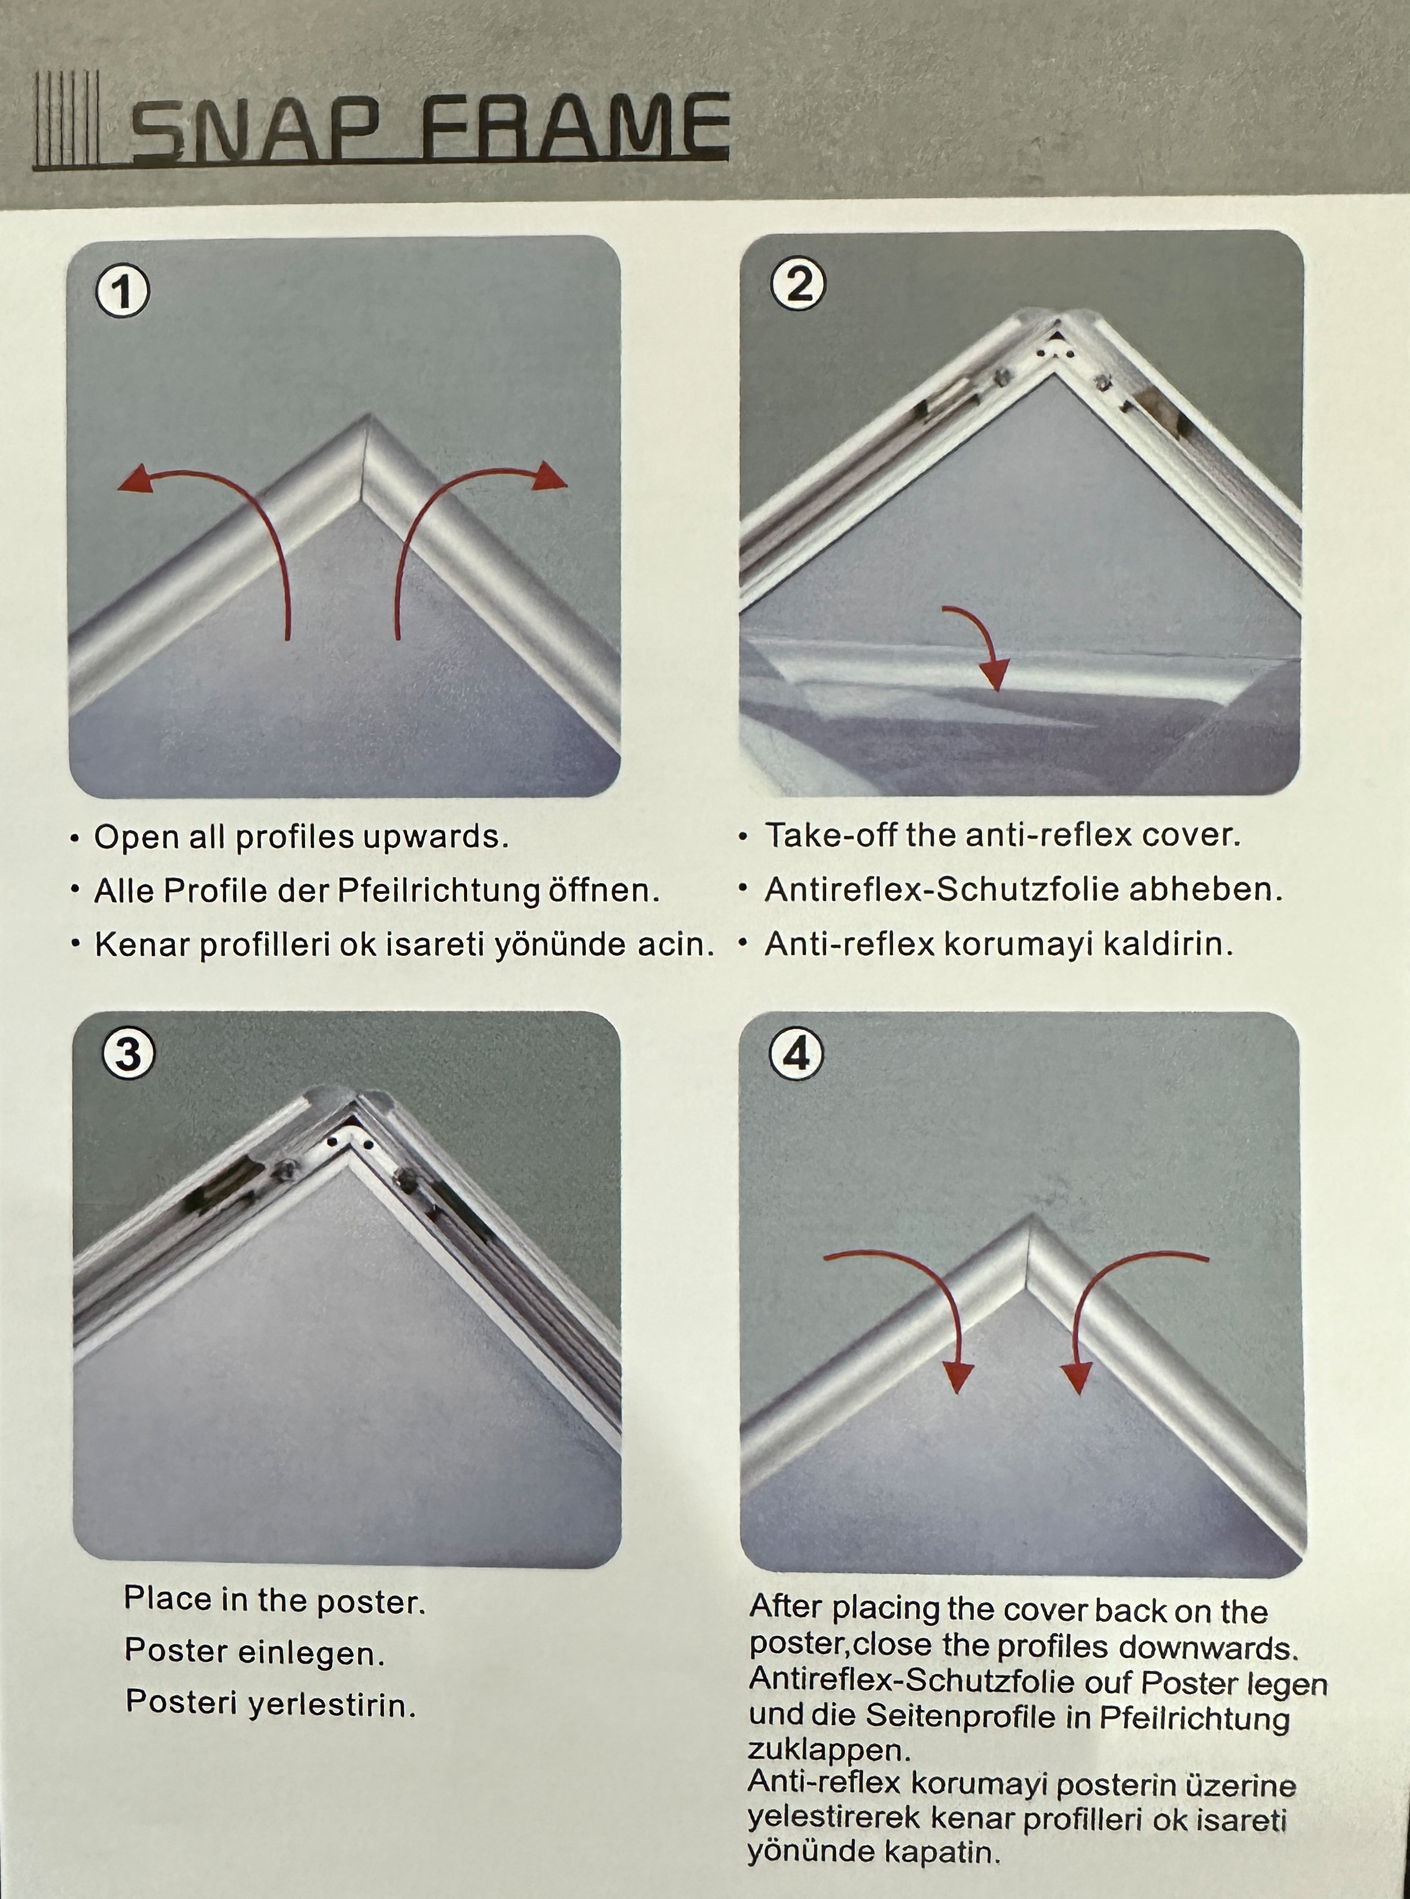
Step 1: Open the snap frame
- Place the snap frame on a clean flat surface.
- Lift one of the front edges of the frame.
- Pull the edge outward until it snaps open.
- Open all four sides of the frame.
- Remove the clear protective cover.
- Take out the backing if needed.
The frame should now be fully open so you can access the mounting holes.
Step 2: Find the mounting holes
- Look inside the frame body.
- You will see pre-drilled holes in the back panel or inner mounting area.
- These holes are used to screw the frame directly to the wall.
- Make sure nothing is covering the holes before installation.
Step 3: Mark the wall
- Hold the frame against the wall where you want to install it.
- Use a level on top of the frame to make sure it is straight.
- With a pencil, mark the wall through each mounting hole.
- Put the frame down and double-check that the marks are level and evenly placed.
Step 4: Drill the wall
- Drill at each pencil mark.
- If installing on drywall, insert wall anchors into the drilled holes.
- If mounting into wood, anchors may not be needed.
- If mounting into concrete or masonry, use the correct masonry bit and anchors.
Step 5: Position the frame
- Place the frame back against the wall.
- Align the holes in the frame with the drilled holes in the wall.
- Hold the frame steady.
Step 6: Install the screws
- Insert screws through the holes inside the frame.
- Tighten each screw slowly.
- Start with the top screws first.
- Then install the bottom screws.
- Do not overtighten, because too much pressure may bend the frame.
The frame should now sit flat and secure against the wall.
Step 7: Insert the sign or certificate
- Place your printed insert inside the frame.
- Put the clear protective cover back in front of the insert.
- Make sure the insert is straight and centered.
Step 8: Close the snap frame
- Push each side of the frame back down.
- Press firmly until each side snaps shut.
- Check all four sides to make sure they are fully closed.
Step 9: Final check
- Make sure the frame is level.
- Check that it is tight against the wall.
- Confirm the insert is clean, straight, and visible.
- Wipe the front cover if needed.
Helpful tips
- Use a level before drilling to avoid a crooked installation.
- Use anchors on drywall for a stronger hold.
- Do not overtighten screws.
- If the frame is large, have a second person help hold it in place.
- Clean the clear cover before closing the frame to avoid dust inside.
Simple installation summary
Open frame → remove cover → mark holes → drill wall → insert anchors → screw frame to wall → insert sign → close frame.